1+ Players
Low teacher engagement
Materials
- Blocks or other building materials (TIP: Building bricks and sticky blocks—for example, Bristle blocks—are ideal because they don’t shift once they are placed.)
- Symmetry board
Setup — Less than 5 minutes
- Create the symmetry board (see examples)
- If using building bricks or sticky blocks, create a line of symmetry down the middle of a board with painter’s tape or a rubber band.
- If using other blocks, draw a line down the middle of a piece of paper or cardboard.
- On one side of the symmetry board, create a design with blocks that shows half of a familiar object (for example, a tree, butterfly, flower, or window). (see examples)
- Put out the symmetry board and at least enough blocks to complete the design.
- To reset symmetry boards:
- Have children take one side apart when they are done so another child can take a turn, or
- Have children take both sides apart and make a new design for another child to mirror.
Instructions
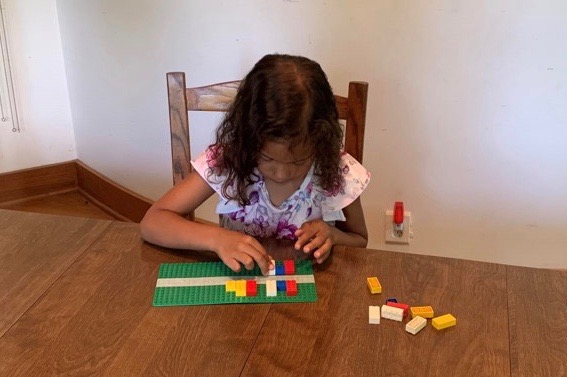
- Teacher creates a symmetry board that on one side has a block design of one-half of a familiar object (tree, butterfly, flower, window, etc.).
- Children use blocks or similar building materials to fill in the other half of the familiar object.
- Once children are done, they can reset the symmetry boards by taking one side apart for the next child, or they can create their own symmetry board for the next child! TIP: Ensure that children understand the difference between a copy of a symmetrical image before doing the activity.

Checks for Understanding
To deepen children’s learning about early math concepts, talk and ask questions while doing this activity together. Here are some examples to get you started.
- “What block do you have that is the same shape/size/color as the one on the other side of the line?”
- “How many blocks did you use? How many blocks are on the board altogether?”
- “Are there the same number of blocks on this side and the other side? Let’s count and check.”
- “How many blue blocks did you use? How many rectangles did you use?”
- “What block should be right there? What block is on the other side of the line?”
- “How can you figure out where that block goes on the board? How did you know where to put that block?”
- “How can you make it symmetrical so it’s the same picture but flipped over the line? How do you know it’s symmetrical and the same as what’s on the other side of the line but flipped?”
Activity Modifications
Once you have tried out the activity, here are some other things you can do. Try these modifications to keep the activity interesting and challenging for children all year.
- Give children only as many blocks as they need to complete the symmetrical image.
- Create abstract designs rather than familiar designs
- If children have mastered vertical lines of symmetry, try introducing designs with horizontal lines of symmetry. See these examples.
- For each type of block in the design, provide only that type of block in a different color so children must attend to shape and size instead of relying on color to build the symmetrical copy. For example, use blue 2×2 building bricks in the design, but provide only green 2×2 building bricks for children to make their symmetrical copy.
- Create 3-dimensional designs that have blocks stacked on top of one another.
- Teach the language of collaboration by telling groups of children that if they disagree with where a peer placed a block, they cannot move it with their hands. They need to describe their idea to the other child. Teach them sentence starters like “I have another idea where it goes…” or “I think it goes there because…”